Welcome

Shopping Cart

•••••

Your cart is currently empty.

Blog

Case Study: Thin Ground Probes are Necessary for Deep Leaks

Type of Pool:

Vinyl / In-ground

Equipment Used:

Leakalyzer, XLT30H Bigfoot and Ground Probes, Hydrophone, Pressure Testing Kit, Dye

Situation

We received a call about a pool that had just had a new liner installed, but was still losing lots of water. The customer suspected the water loss was in the main drain line. When we arrived to the pool the Leakalyzer confirmed the reported water loss.

Solution

The main drain lines were plumbed separately up to the equipment, so we put an open plug in each of the main drains to see if they would draw dye. One line did, but the other did not. To confirm, we pressure tested the line that drew dye with water and it failed. In order to pinpoint the exact location of the leak, we then induced air into the line and began to listen with the hydrophone for a leak under the pool, but didn’t hear any significant noises. We then switched to using the Bigfoot microphone with the XLT30H to listen through the concrete around the pool and still didn’t hear anything that indicated the leak location. Only when we started using the XLT30H ground probes in the soil between the pool deck and the equipment were we able to get close enough to the leak to pick up a great noise and find the exact location of the leak.

Learnings

  1. Thin ground probe rods included with the XLT30H make it possible to get the probe deep into ground to absorb leak sound vibrations.
  2. Turning air pressure off and back on once hearing the leak location confirms the noise is the one we are making.

Pressure Testing Tip: How to Check for Leaks in the Main Drain Without Plugging the Line

While plugging the main drain is the most accurate way to pressure test the main drain line, if you want to avoid getting in the pool, it is possible to identify a problem in the upper part of this plumbing by using a technique called an Air Lock Test. This test takes advantage of the fact that the water above the main drain in the deep end of the pool produces a measurable amount of pressure that acts as a “plug” to an air filled main drain line.

After pressure testing the rest of the plumbing lines to ensure they are sound, induce air into the  equipment end  of the main drain line until you see it bubble out of the main drain. Then, close the valve on your pressure tester. Assuming the main drain is under about 9′ of water, the water column above it should provide 4 psi of pressure on the trapped air within the line. A pressure drop below 4 psi is an indication of a leak somewhere in the upper section of the plumbing. If the depth of the main drain you’re testing is different than 9′, the pressure the water puts on the air lock can be calculated at .43 psi per foot of water.


If there is a leak in the line in the section above the bottom of the pool, the amount of pressure loss can be used to indicate where in the line that leak is. Pressure will drop quickly until water reaches the location of the leak, at this point even though water is escaping from the leak, air will be trapped and held at a pressure representing the difference between the leak level and the water level of the pool. So, if you see that you pressure quickly drops to 2 psi, it’s likely that there’s a leak in the main drain line somewhere between 4′ – 5′ under the water level of the pool.


If there is a leak  in the section of the line at or above the water level of the pool, you’ll see a quick drop to 0 psi.

A leak in the section of plumbing under the pool shell will not be indicated from this test due to the fact that the air is still supporting the full column of water in the pool. So, if a leak is still suspected in the main drain line, it will have to be inspected by fully pressurizing the line with a plug in the main drain.


Case Study: Listening Devices Pinpoint Even the Deepest Leaks


Equipment Used:

XLT30, Pressure Testing Kit , Leakalyzer

Situation:

The customer noticed that a lot of sand was being blown into the pool and that there were bubbles in the air filter, so a problematic skimmer line was isolated and shut off.  However, even after closing and plugging that problematic skimmer line there were still sand and bubbles being blown back into the pool.

Sand in pol from leaking skimmer return line.

Solution:

When we arrived to the pool, the skimmer line was plugged and a Leakalyzer test with the pump off showed no water loss. That made us suspect that at least the portion of the plumbing below water level was good. We then pressure tested the other two skimmer lines to confirm the whole line was good and they held pressure. The main drain was eliminated as the source of a problem without getting in the water through our Leakalyzer test that covered the plumbing below the water line and an air lock test that included the line that was above water level. Eliminating all of these other areas left us to examine the problematic skimmer line as the only potential problem. Upon further inspection, the valve used to shut off the line wasn’t holding, which explains the continued bubbles and sand in the pool even after the line was taken out of use.

To determine the specific location of the leak within the faulty skimmer line, we induced air into water saturated soil to listen with the XLT30. At first the bubbling and gurgling sound of a leak was faint, but just by turning the volume up on the XLT30 we were able to identify a distinct noise where the leak was. It was fairly easy tonarrow the leak location down to a 6’ diameter, but in order to get down to within 2’ of the leak we needed to use the advanced filtering capabilities of the XLT30. Once the high filter was turned on, there was a clear spot with the most distinct noise. As sound waves travel they get more and more muffled, so the sound will be crispest and most distinct right over the leak. The sound did fade a little as time went on, but re-saturating the soil by inducing more water into the line revitalized the sound.

The customer estimated that the skimmer line was 18” to 2’ deep, but when we cut the concrete and dug down to that level there wasn’t any moisture or pipe. To confirm we were in the right place we turned the pressure back on and still heard the leak so kept digging and finally found the broken pipe at just over 4’ deep. Before we replaced the cracked fitting we cut the pipe and pressure tested both ways to assure the rest of the line was good.

Digging in concrete deck for plumbing leak

Learnings (are there any key takeaways or learnings from how this leak was found?):

  • Combining a Leakalyzer test with an air lock test of the main drain can confirm that line is solid without getting into the pool.
  • If you notice a once strong leak noise fading, you may just need to add more water to re-saturate the soil.
  • Trust your equipment! If you’re confident you heard a leak in a specific place, you may have to dig farther than expected to find it, but it will be there.

Case Study: Air Escaping From a Leak is Loud

Type of Pool:

Vinyl Liner

Equipment Used:

Leakalyzer, LeakTrac 2400, Pressure Testing Equipment, Dye

Situation:

This job started as a request for us to run a vinyl liner scan with the LeakTrac because the customer had a leak that they suspected was in the liner in a swim ledge. So, when we arrived at the pool we did a scan of the liner, which showed the suspected swim ledge wasn’t actually a problem. The LeakTrac did locate a small leak on the vinyl stairs, but this leak didn’t draw enough dye to be the source of significant water loss. We quickly patched this leak with a Leakmaster Peel and Stick Patch before moving on to do a full leak detection.

Image of Pool

Solution:

With a quick pressure test we found a skimmer line was not holding pressure. We then switched from inducing pressure with water to inducing pressure with air and heard a loud bubbling and gurgling sound  right in the skimmer bowl without even using a listening device.  The leak turned out to be a broken pipe just below the skimmer bowl.

To verify the rest of the line was good we dropped a 550 inflatable plug with an extension hose in past the leak and found the rest of the line held pressure.

A repair was scheduled for a later date, but before leaving the pool we plugged the skimmer line and ran a Leakalyzer test to confirm all leaks had been found.

Learnings:

  1. Pressure testing is a quick way to isolate a pipe leak
  2. Air escaping from leak in pipe makes a great noise for sonic location
  3. The LeakTrac not only can be used to find leaks, but also to eliminate the liner as the location of a leak if no leaks are found


Pressure Testing Myths Busted

Pressure testing is a topic where a number of myths and misunderstandings have developed in the swimming pool industry. Below, we explain the truth behind 4 common misconceptions that should help you stay focused on efforts that will lead to leak detection success and profits.

MYTH #1: Pressure Testing is Unnecessary for Leak Detection

While you may be able to find common leaks without pressure testing, if you want to leave the pool assured that you have found all of the leaks . . . and you want to give the customer that assurance, pressure testing is critical.

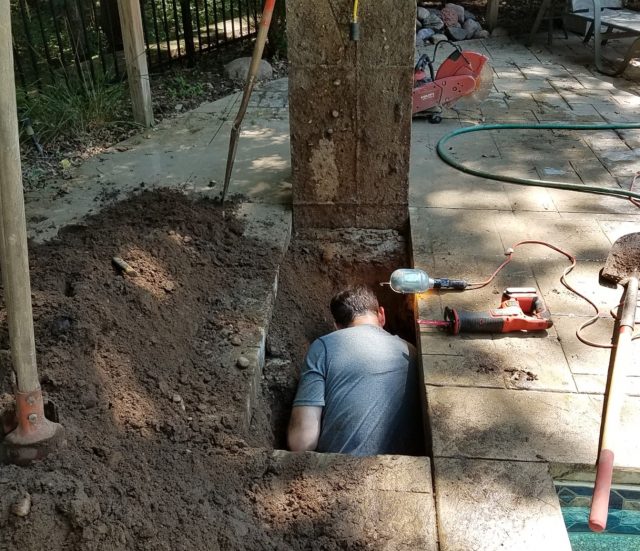
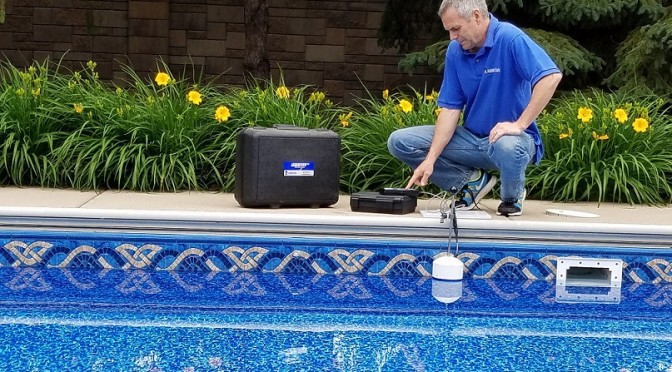
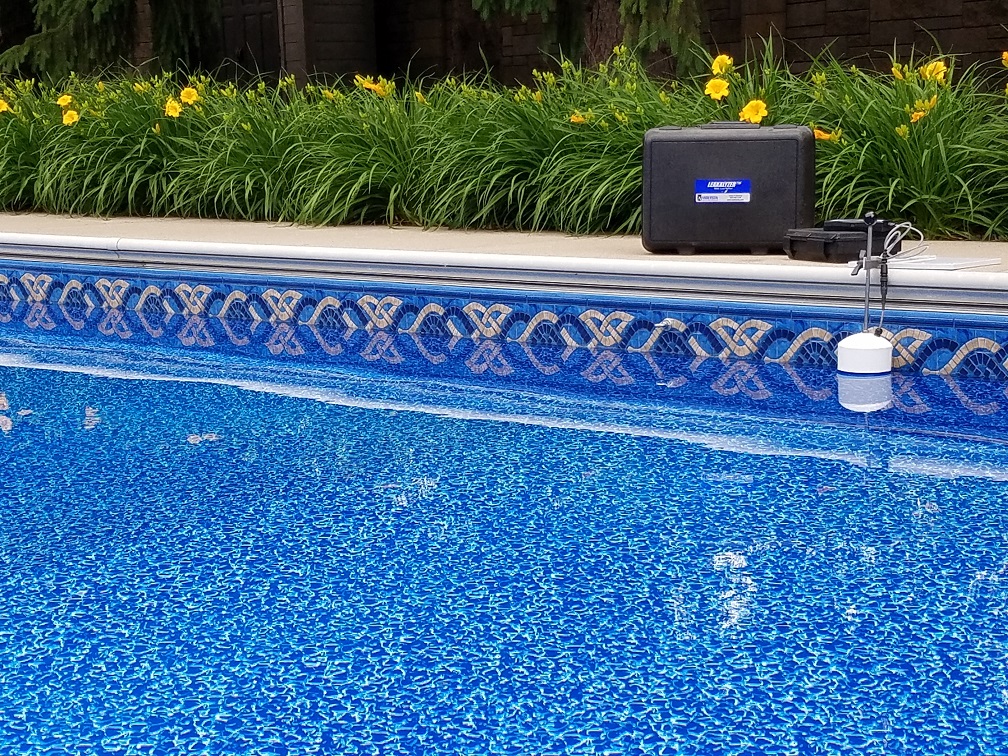
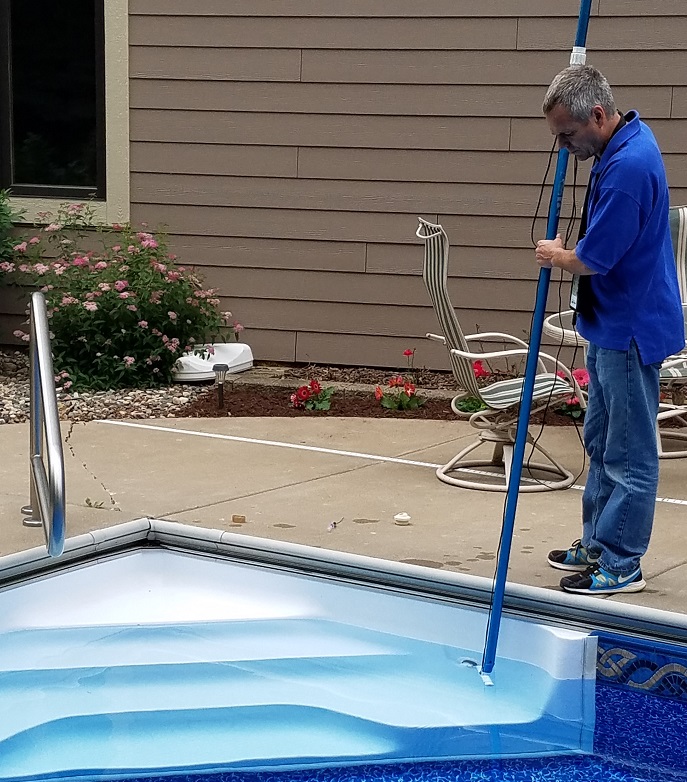
There are other ways of finding easy to reach leaks in plumbing, but from the standpoint of conclusively determining if the entire line is leak free, nothing beats a properly performed pressure test.  Furthermore, despite advancements in cameras and other probes that have applications in some situations, the most common and dependable way of pinpointing leaks underground involves the use of a listening device that picks up the sound of pressurized air escaping from a leak into water saturated soil.

MYTH #2:  Air Can Be Used Interchangeably With Water for Pressure Testing

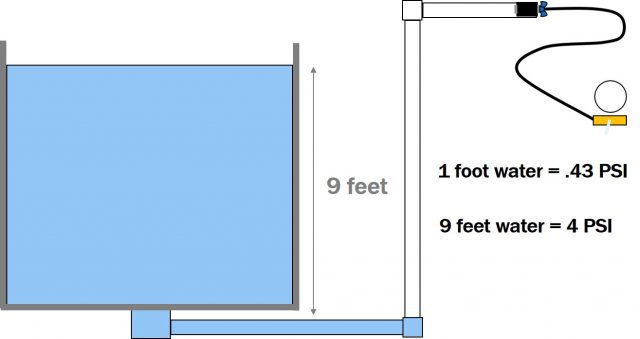
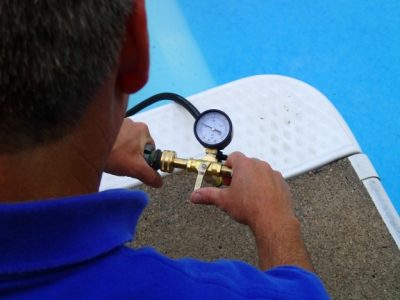
Air and water behave very differently in pressure testing situations.  Understanding three pressure testing principles that address these differences is important as you determine when to use air and when to use water to build pressure.

  1. Air compresses under pressure, water does not
  2. Air stays at the top of the pipe, water stays at the bottom
  3. Air escapes from leaks faster than water does

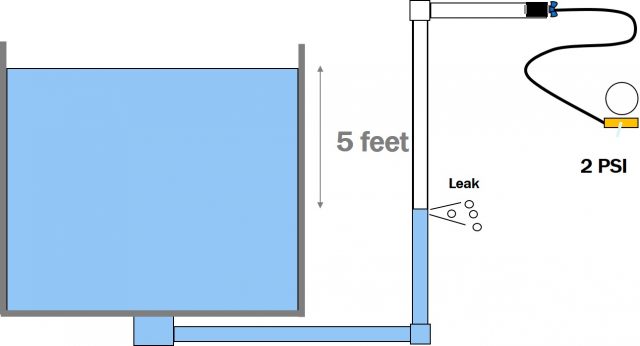
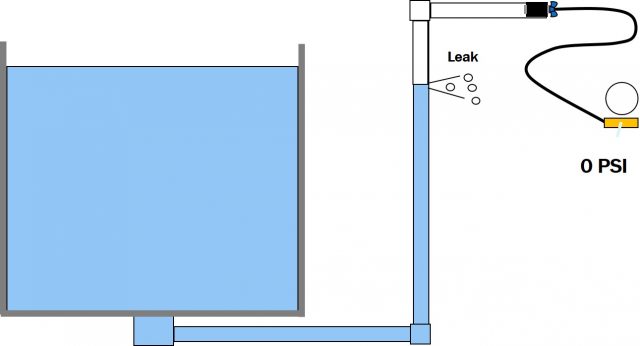
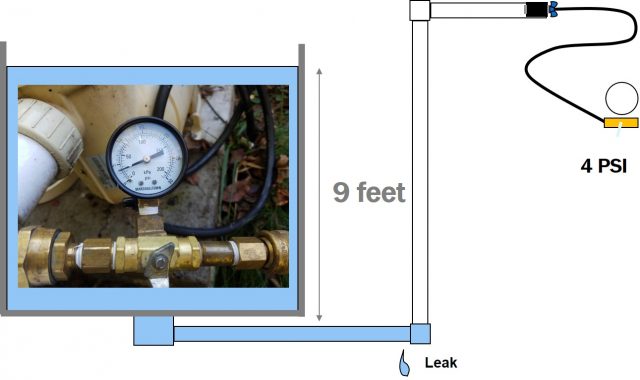
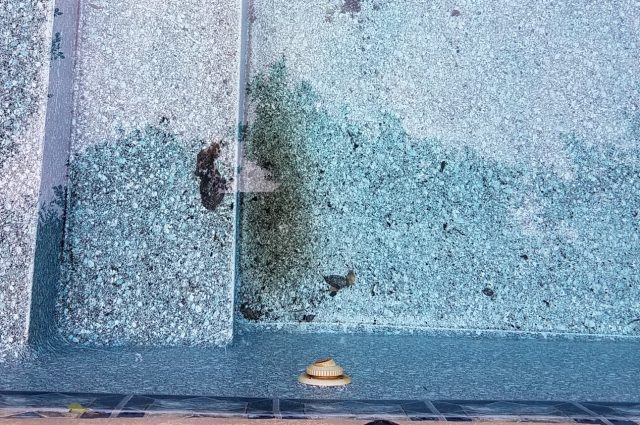
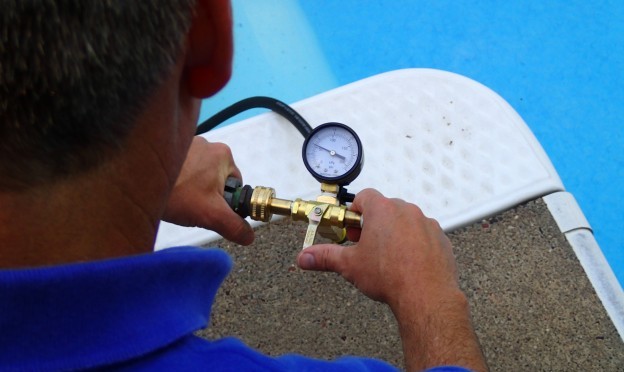
Our pressure testing slide show provides helpful diagrams and more explanation of how these principles affect your test results.  As a general rule it is best to use water when testing to determine if the line is leaking since it does not compress under pressure so it will show a loss in pressure quickly, even with a small loss in volume.  On the other hand, air trapped in a line can expand as water volume is lost from the leak, slowing (and sometimes completely masking) a drop in pressure. Additionally, if plugs happen to pop out under pressure they will come out with much less force if the line is pressurized with only water . . . trapped air will propel a popped plug like a cannon ball!

The main benefit of using air is that it makes a much better noise escaping from the pipe into water saturated soil than water does.  So, once you have identified a leaking section of plumbing with a water test, switch to air to produce a good noise that can be picked up by your listening device.

Myth #3: Air and Water Can Be “Mixed” in a Pressure Tester and Will Stay “Mixed” Inside the Pipe

We’ve debunked this myth by testing it on a plumbing system made of clear PVC.  Regardless of how they are transmitted into the pipe, water stays low and air stays high.  They do not stay mixed up just because they are put under pressure.  This is simple physics and anyone who says otherwise is selling you hocus-pocus.

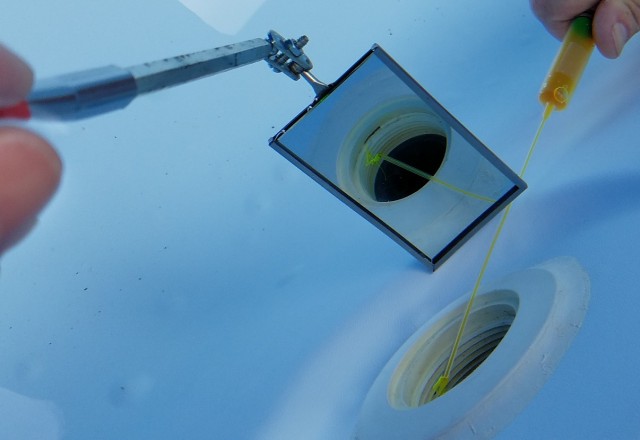
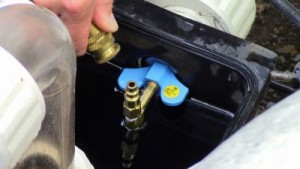
Adding both air and water to a line is not the first step you should take when trying to make a good leak noise.  While it is indeed important for the soil to be full of water outside of the pipe where air will blow out through the leak, no noise is made unless air actually gets to the leak.  Since water stays at the bottom of the pipe and air at the top, if the leak is in the low end of the plumbing no air will get to it if you are adding both air and water.  So, all of the water above the leak level must be purged from the line before this happens. Generally this is best accomplished by removing a low plug and blowing air from the high end.  Once you see bubbles, replace the plug, set your air source regulator to maintain no higher than 5 psi, and begin listening.  Larger leaks and/or leaks in soil that drains quickly may necessitate adding water while air is going into the line.  To avoid noises inside the pipe, do this with a separate pressure tester from the low end of the plumbing.  The best results happen when air and water do not mix inside the plumbing . . . just at the leak!

MYTH #4: Certain Kinds of Gas Make Better Noises Than Others for Leak Location

Any gas escaping from a leak will make bubbling/gurgling /hissing/spotting sounds in the full range of sonic frequencies that can be picked up with a listening device.  Sometimes, leak detectors will use nitrogen tanks to deliver the gas into the line quietly (without the conflicting sound of a compressor).  However, these tanks are used not because of any special characteristic of the gas (in fact, the air we breathe is made up of 78% nitrogen) but because of its ease of availability and inexpensiveness in relation to other gasses.  SCUBA tanks adapted with an adjustable regulator can also be used if you can get them filled.  A small compressor works just fine for inducing air pressure, especially if you use a 50 foot hose that allows you  to position the compressor some distance from where you are listening.

In some situations where soil or leak conditions make it difficult to create a noise helium gas is used to find underground plumbing leaks.  In these situations a Helium Detector picks up the presence of the gas as it makes its way to the soil’s surface.  Helium is not being used because it makes a better noise, but because it can be detected by this detector.

If you have any questions about pressure testing or swimming pool leak detection, consult the Resource Center of our website or give us a call.


Inflation Pressure Matters

Although inflatable plugs are extremely convenient and versatile, they’re also less durable than other types of plugs.   To keep them in proper working order and avoid unnecessary replacement it is important to use them correctly. Be careful to inflate the plugs only to the specified PSI (pounds per square inch) designated for each one. While it may be tempting to overfill a plug to try to fill a slightly larger line, you’ll save money in the long run by using the appropriate plug for the pipe being tested. The best way to ensure proper inflation pressure is to use a hand pump with an attached gauge. Since not all sizes have the same required inflation pressure, we’re provided a chart below for easy reference:

Inflation pressure for inflatable plugs


Example of Typical Leak Detection

Even though we stay busy making, selling and servicing equipment and supplies for the trade we make sure to regularly get into the field and find leaks to stay sharp and test products.  Just recently we were called by a local pool professional who had a customer with an elusive leak and a long history of water loss in their pool. Two companies had been out before us with no success so we knew we were in for a challenge.

Background information from the customer:

  • Water loss dates back several years.
  • New liner installed last summer.  Light was abandoned.
  • Customer was suspicious of steps but said it had been thoroughly dye tested with no results.
  • Was losing at least an inch per day and pool owner revealed it had lost 3/4″ in the 14 hours prior to our visit.
  • Previous companies had done pressure tests and everything passed as leak free.
Leakalyzer analyzes water level to provide valuable information.

The first task for us was to gather our own information so the Leakalyzer was set up promptly upon arrival.  The Leakalyzer is able to measure water loss to the 10,000th of an inch.  It quickly (5 mins) confirmed that we were losing an inch or more of water per day.  The initial test was done with the pump on – the way the pool was when we arrived.  We then did another test with the pump off.  The leak was consistent regardless of whether the pump was running or not.  Since we were losing an inch or more per day we knew we were looking for a significant leak.  Our calculations brought us to around a quart per minute.

The next step was to dye test the fitting and stair gaskets then get the LeakTrac going.  A Quick 10 minute sweep of the pool with The LeakTrac confirmed there were no leaks in the new liner.  All the gaskets passed their dye tests.

Even though a pressure test had been performed by others we wanted to do our own to make sure.  We had a hunch it was the main drain line so we started there and did an air lock test. It held right at 4.5 pounds of pressure (generated from 8 feet of water column).  We then tested the skimmer and return lines and they held pressure too.

Now with all the lines plugged the Leakalyzer was still showing us that the pool was loosing over an inch per day.  The leak seemed be someplace other than the plumbing and the liner.

LeakTrac locates a leak in a stair return fitting.
LeakTrac locates a leak inside a stair return fitting.

We decided at that point to check with the LeakTrac one more time before getting into the pool to dye test the main drain.  As we more thoroughly swept the pool one return was screaming louder than the others. The return in the stairs.  This shouldn’t be since the stair return doesn’t have screws penetrating through the fitting and it currently had a nylon plug in it eliminating any distracting connection to ground through the equipment.  We shouldn’t be getting a signal here but we were.  The signal was not around the fitting but right next to the plug.

A dye test confirmed that water was escaping right past the plug that was sealing the threads.

We needed a mirror to fully see the problem when the plug was removed. Inside the  top of the fitting was a small crack  that was pulling a lot of dye.

FITTINGCRACKMIRDYEweb

The customer was happy we had finally found the problem.

Quick Notes / reminders from the job:

  • Following a systematic process of elimination helped zero in on the problem.
  • Leakalyzer helped us understand the true nature of the problem and confirm we stopped the leak once fixed.
  • LeakTrac helped us confirm the liner was OK and pinpointed the leak at the stair fitting.
  • Mirror was essential to thorough dye testing.


Pressure Testing: Putting The Pressure On

Regardless of whether the leak is suspected to be in the plumbing or the structure of the pool, a pressure test should be done to provide confirmation of which parts of the pool are leaking, and which can be eliminated as suspected leak areas. This is important not only because it saves time in later leak location steps, but also because it allows the technician to provide the pool owner with the assurance that leaks have been found and fixed are isolated to the pool.

To do a pressure test, closed test plugs are used to block off all but one of the exposed openings of a section of plumbing. A pressure induction system is put in the remaining opening (usually at the equipment). Water is then induced into the line through the Pressure Tester and the system is brought up to no higher than 20 PSI. A pressure drop indicates a leak. A line that holds pressure can be eliminated as a potential leak area.

(Above is a video on how to pressure test)

While a pressure test of an entire plumbing system may be adequate in situations where a structural leak is suspected, individual sections of plumbing should be tested if a plumbing leak is suspected. Valves at the equipment can often be used to isolate these sections as they are tested first. Do so by testing from the equipment to the closed valves to see if they hold pressure (illustrated below).

OPEN PLUG in pump
Pressure test from pump for isolating suction side plumbing.

Water is used for this isolation pressure test because it does not compress under pressure and as a result gives more accurate and quick results. Water is also advantageous for this test because if test pressures get higher that a safe level, plugs that pop out under water pressure will not fly from the openings as a dangerously as those that pop out under air pressure.

Accept no compromises when it comes to the sealing effectiveness of your test plugs. Tapered plugs have tendency to pop out under test pressures wasting valuable time and putting anybody in the area of the tapered plug at risk of injury. Plugs with straight-sided rubber and large corrosive resistant hardware allow for extra sealing area, easy expansion, and ultimately more accurate results.

Your pressure induction system should allow for easy access to a variety of different plumbing openings and allow the introduction of either water or air (for later leak location steps) into the plumbing. A system utilizing various sizes of open stem plugs, which can be quick-connected to the pressure tester, provides the ability to do this without having to cut lines or jerry-rig fittings. A pressure tester should include a 0-30 PSI gauge, hook ups for a garden hose and air line, a valve to control these and block off the system, as well as a means of releasing pressure from a line that has been tested but does not leak.

For additional information and a comprehensive step by step slideshow on pressure testing click below:

plumbing line leaks


Visa, Discover, MasterCard, American Express, & PayPal